When you use an image in layouts where the area is fixed (Banner with defined height, Background, Split), the image needs to be adjusted to the area. Depending on the image’s proportion versus the screen, parts may be cropped. So you don’t lose control over this adaptation, Yay! Forms offers two controls:
- Image fit — defines how the image fits the area.
- Focal point — defines which part of the image should always remain visible.
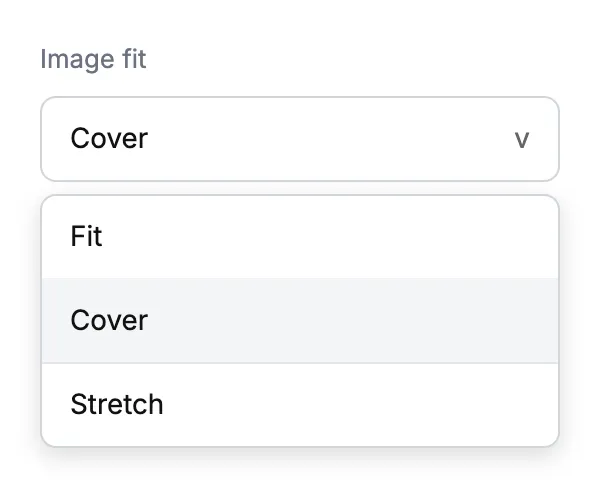
Image fit
In the right sidebar of the Question, below the layout options, you’ll find the Image fit selector with three options:
- Fit — the image appears entirely within the area. There may be empty space around it (white/colored bars), but nothing is cropped. Ideal for logos and illustrations where no detail can be lost.
- Cover — the image fills the entire area, cropping the edges if necessary to maintain proportion. It’s the default for photos and background illustrations.
- Stretch — the image is deformed (loses proportion) to fill exactly the area. Use only if the image is a pattern/texture or if distortion doesn’t matter.
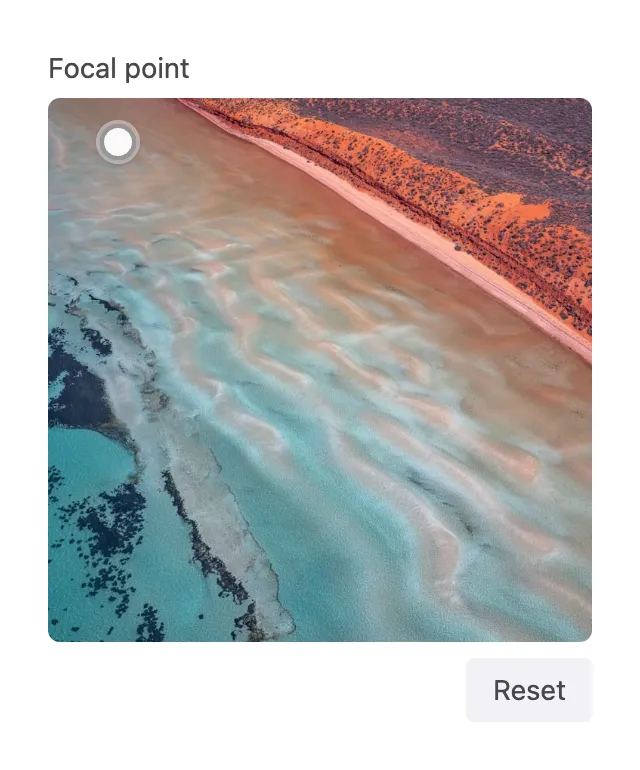
Focal point
When the Image fit is Fit or Cover, the Focal point selector becomes available. It defines which region of the image should stay visible even when the device is resized and part of the image needs to be cropped.
To configure:
- On an image with Fit or Cover image fit, scroll the sidebar to the Focal point area.
- Click or drag the dot on the image thumbnail to choose the region that should always appear (e.g., the person’s face, the product, the headline).
- To remove the dot and return to center (50%/50%), click Reset.
Combining with per-device customization
Image fit and Focal point are also configurable per device. For example:
- On Desktop: use Cover with focal point on the person’s face.
- On Mobile: switch to Fit with centered focal point, ensuring the entire image appears even on a narrow vertical screen.
Learn more in How to customize the form layout per device.
Best practices
- Fit is best when the image has important text or a logo (nothing gets cropped).
- Cover with a defined focal point is best for professional photos (fills everything and keeps the subject framed).
- Always test the result starting with Mobile (which tends to concentrate most responses) and then check on Tablet and Desktop, switching tabs above the canvas.
- Avoid Stretch with photos — only use it for textures and patterns.
Related resources
Support
If you have any questions or suggestions, send an email to help@yayforms.com
Conclusion
With Image fit and Focal point, you gain precise control over how your images behave on screens of different proportions. Use Fit to preserve the entire image; use Cover with a focal point for professional photos that need to fill the area without losing the main subject.