This article fixes one of the most common issues when connecting Yay! Forms to Meta Ads: your form submissions are tracked fine (the YFSubmit event shows a “success” status in your Yay! Forms logs), but the Lead event never shows up in Facebook Events Manager, so campaigns optimized for Lead conversions receive no data.
It’s usually not a technical problem with your pixel. In most cases Meta is holding your custom events in a blocked state until you review and approve them. The steps below unblock them.
Why this happens
The first time a new custom event reaches Meta (YFSubmit, YFStart, YFView, or YFAnswer), Meta doesn’t activate it automatically. It parks the event as “Blocked by Meta” until the pixel owner reviews and confirms it.
This is Meta’s way of making sure advertisers know and consent to the data their pixel collects. Until you approve them, the events stay out of your event activity and can’t be used for ad optimization, custom audiences, or conversion tracking.
Step 1: Open Facebook Events Manager
Go to https://eventsmanager.facebook.com and select the Pixel / Data Source connected to your Yay! Forms integration. Identify it by the name you gave the pixel, or by matching the Pixel ID configured in your Yay! Forms settings.
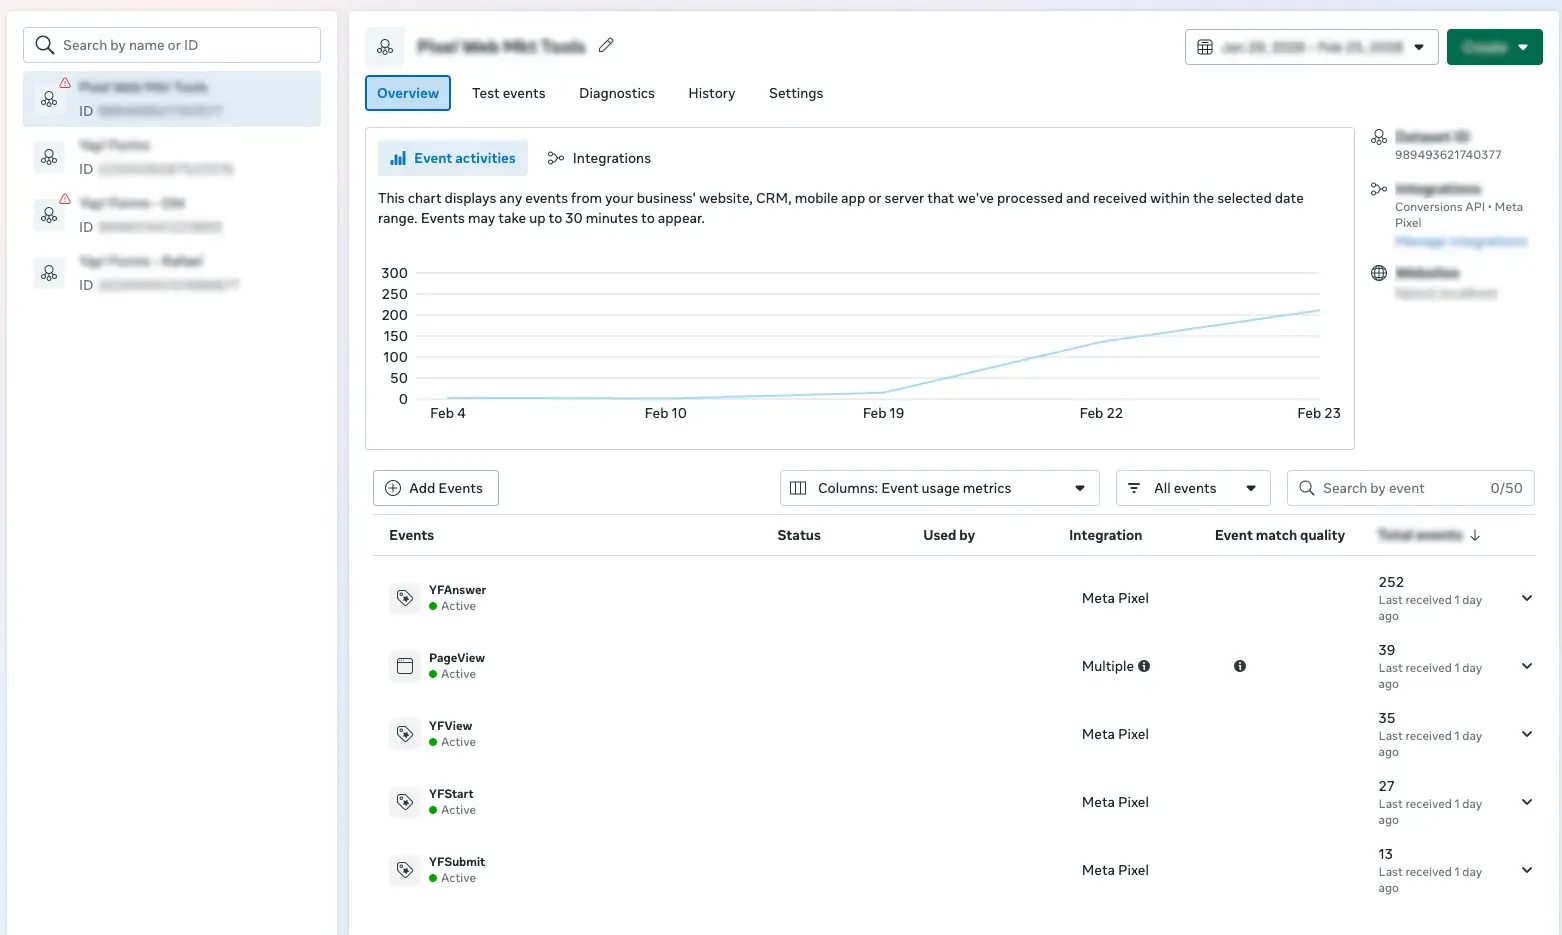
Step 2: Go to the Settings tab
With your pixel selected, click the Settings tab in the top navigation of the data-source panel, then scroll down to the Manage Event Blocking section.
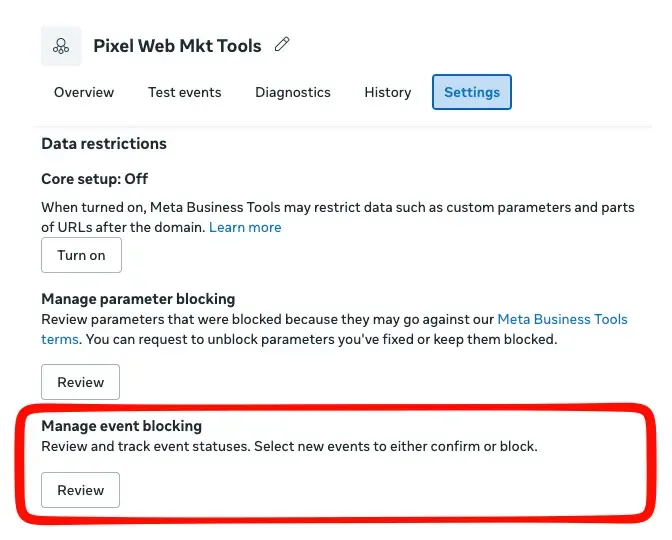
Step 3: Click “Review”
Click Review next to Manage Event Blocking. A pop-up explains Meta’s Business Tools data-sharing terms: it reminds you not to share sensitive data (financial, health, consumer reports, and the like) and that you agree to send only events that comply with Meta’s terms. Read it and click I Confirm to continue.
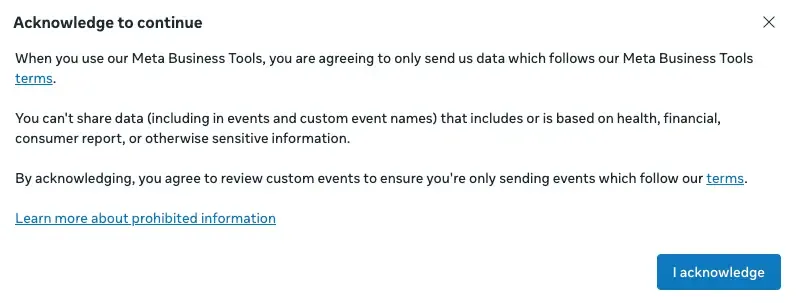
Step 4: Review the event status list
You’ll now see every custom event on your pixel with its status. The Yay! Forms events show as Inactive and Blocked by Meta, with the source listed as “Site.”
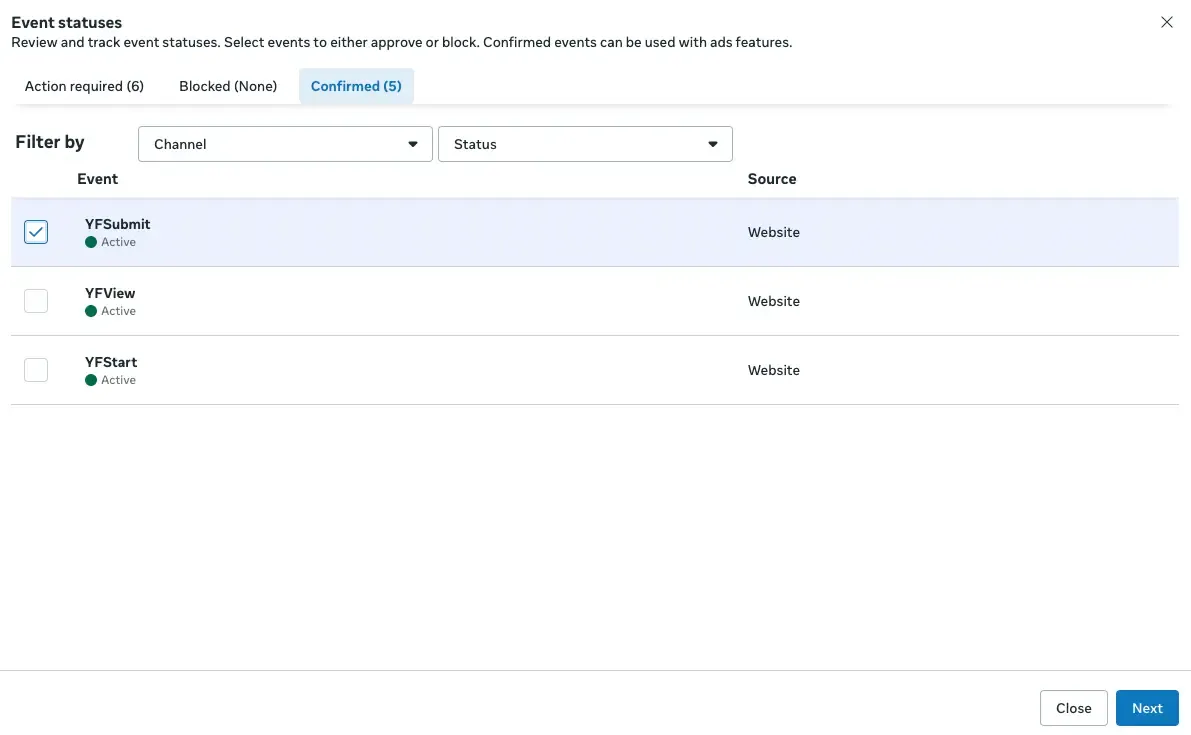
Step 5: Confirm each event
For each event you want to activate (especially YFSubmit, which maps to your Lead conversion):
- Click the event name to open its detail panel.
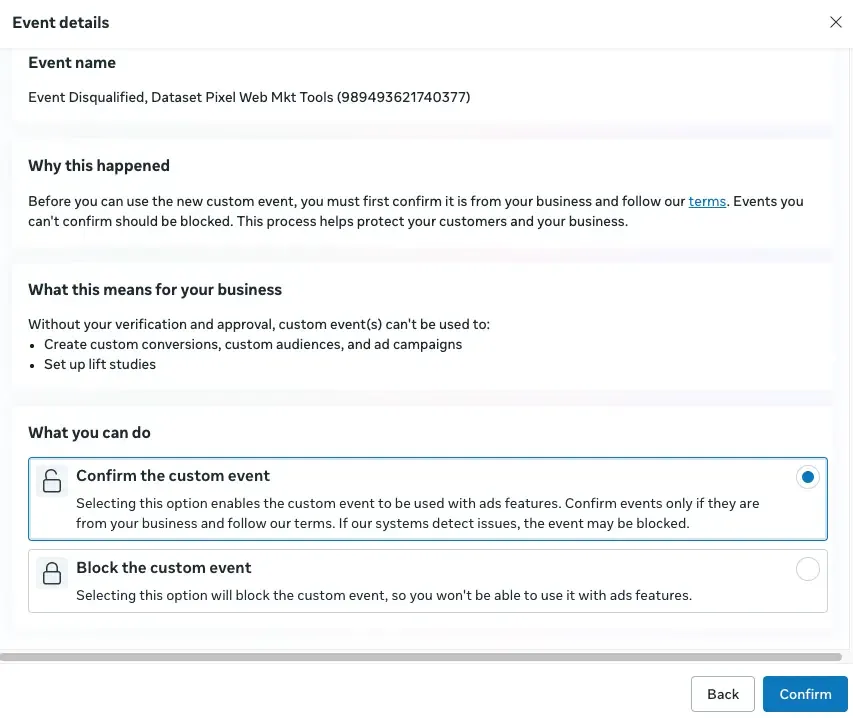
- The panel offers two options: Confirm the custom event (lets the event be used with campaigns, custom audiences, and conversion tracking) or Block the custom event (permanently blocks it).
- Select Confirm the custom event.
- Click Confirm at the bottom of the panel.
- Repeat for every event you want to approve.
Step 6: Verify the events are active
Return to the Events Manager overview. The events should now read Active instead of “Blocked by Meta,” and activity should start appearing in the graph as submissions come in. To validate, submit a test form and watch for the event in the activity graph within a few minutes.
Good to know
- Processing delay: after approval, events can take up to 20 minutes to appear. Give it time before troubleshooting further.
- Event quality: once active, keep an eye on the Event Quality Score in Events Manager. A higher score means better matching and more effective optimization.
- No campaign changes needed: if your campaigns already optimize for the Lead event, they start receiving conversion data automatically once the event is unblocked.
- Future events: any new custom event Yay! Forms sends later goes through this same approval once.
Still not working?
If events are confirmed but still missing after 30 minutes, check:
- Pixel ID: confirm the ID in your Yay! Forms settings matches the one in Events Manager.
- Meta Pixel Helper: install the Chrome extension and visit your form page to see in real time which events fire and whether any error appears.
- Test Events tab: in Events Manager, open Test Events, enter your form URL, and open it in a new tab. Triggered events appear live so you can debug.
- Contact support: if it persists, reach out to Yay! Forms support with your Pixel ID and form URL.
Conclusion
You’ve learned why Meta holds new custom events in a blocked state, how to unblock the Yay! Forms events (YFSubmit, YFStart, YFView, YFAnswer) from the Manage Event Blocking section, and how to verify they’re active. Once confirmed, your campaigns start receiving Lead conversion data automatically.
Related articles: