This guide covers the native integration between Yay! Forms and Google Ads. When someone submits your form, Yay! Forms reports the conversion directly to your Google Ads account, server to server. There is no tag to install and no Google Tag Manager setup, and nothing depends on scripts running in the respondent’s browser. Yay! Forms captures the Google click id (gclid) automatically and can also match the conversion by email or phone, following Google’s Enhanced Conversions for Leads.
The integration screen has two numbered steps, and this article follows the same order:
- Connect your Google Ads account: Google login, Ads account, and field mapping
- Conversion conditions: which conversion action to send, and when
Prerequisites
- A Yay! Forms account on the Plus or Professional plan (the trial includes it), with a form created.
- A Google account with access to your Google Ads account.
- A conversion action in Google Ads that imports conversions from clicks. The next section shows how to create one.
- Auto-tagging enabled in Google Ads (Account settings → Auto-tagging), so your ad URLs carry the gclid.
- Enhanced conversions for leads enabled in Google Ads (Goals → Conversions → Settings), with the customer data terms accepted there. Google requires this opt-in before accepting conversions that carry hashed email or phone data, so without it the delivery can be rejected.
1. Create the conversion action in Google Ads
The integration reports conversions through an import, so it needs a conversion action whose source is an import of clicks. In Google Ads, go to Goals → Conversions → All conversions and click New conversion action.
On the Choose data sources to measure conversions screen, tick Offline conversions and click Save and continue. That is the option that creates the import conversion. Google has renamed this path more than once (older screens say “Import” or “CRMs, files, or other data sources”), so use the description as your reference: “conversions that happen off the internet, measured by connecting data from a CRM, importing a file, or using the Google Ads API”.
On the next step, choose Track conversions from clicks, give it a name such as “Qualified lead” and save.
The Conversion dropdown in Yay! Forms lists only conversion actions of this kind that are enabled. Conversion actions created by the Google tag (website type) or imported from Google Analytics will not appear. To check that your action has the right format, open Goals → Conversions: the Conversion source column has to read Website (Import from clicks).
2. Open the integration
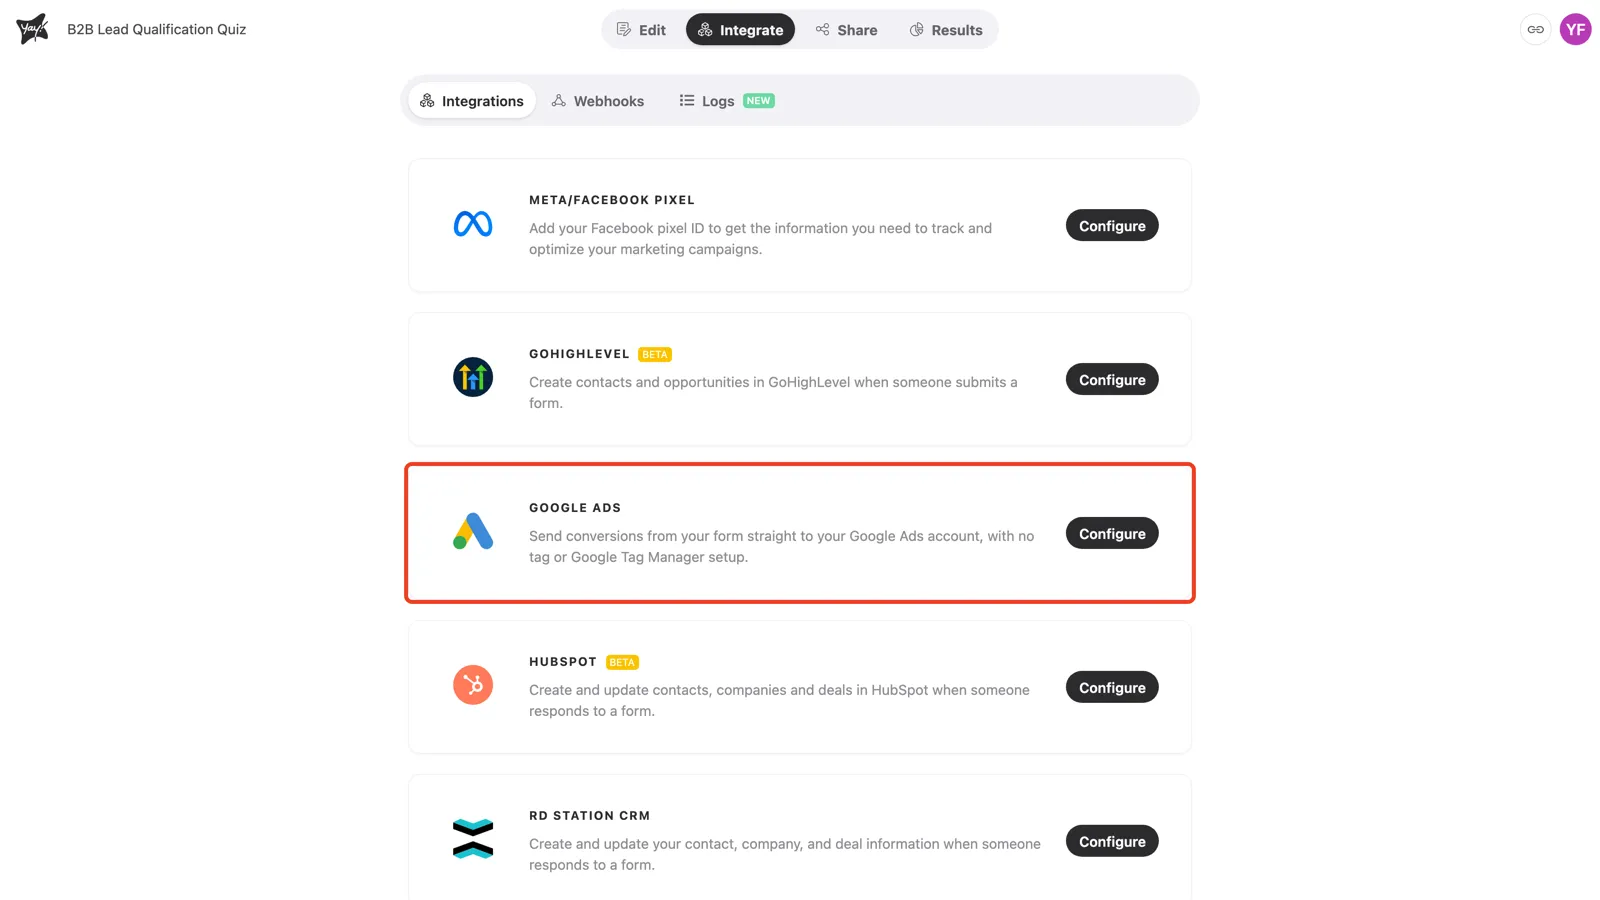
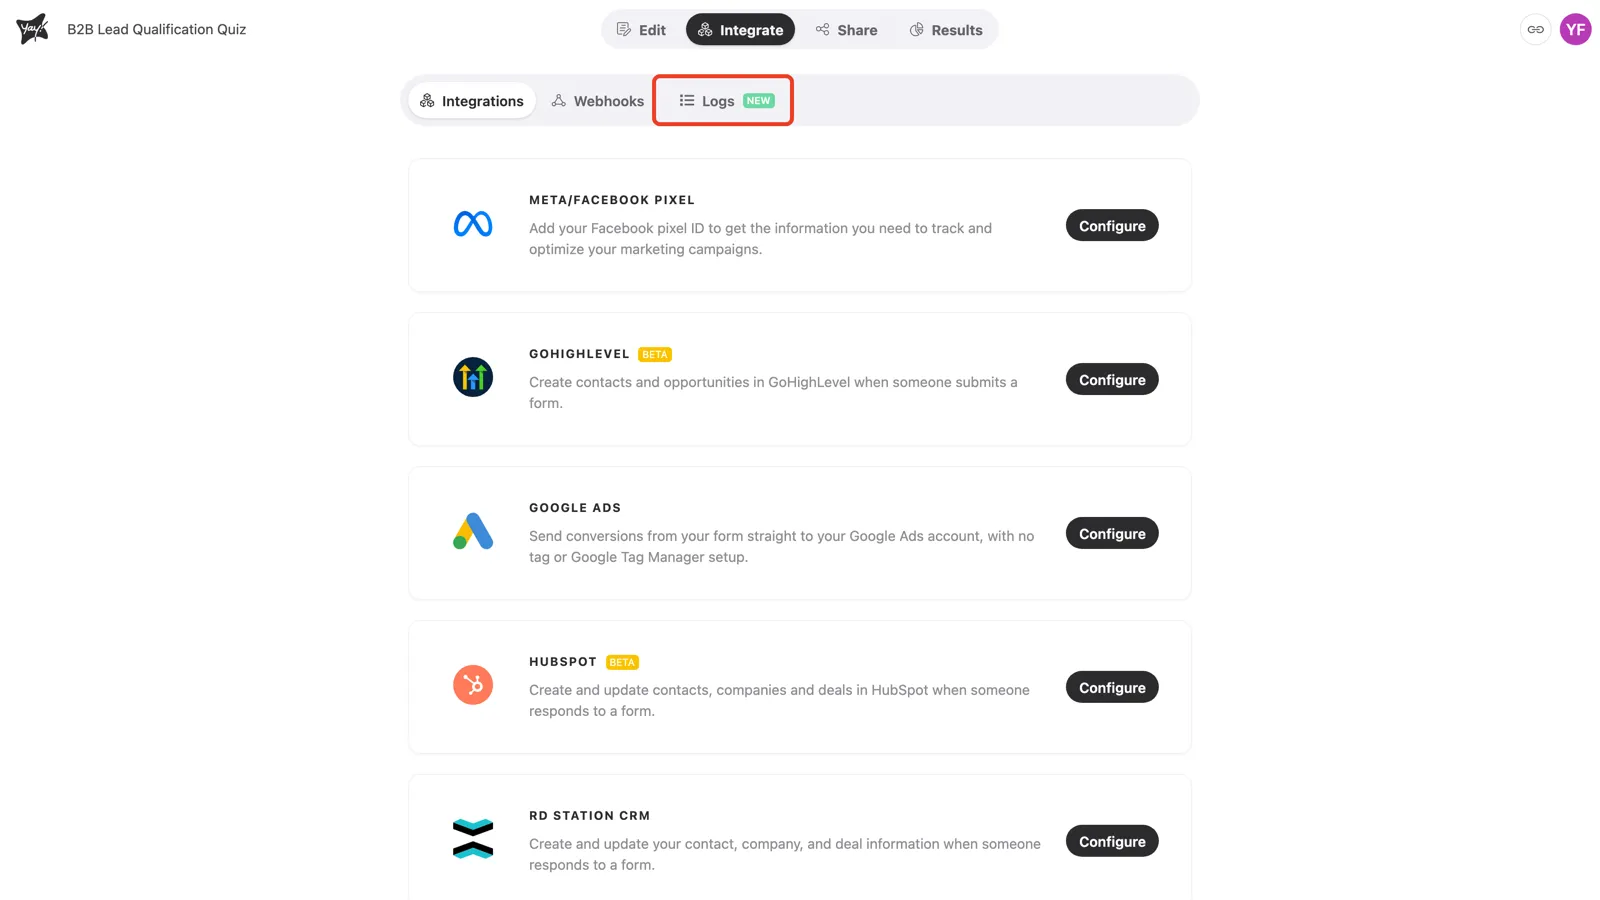
Open your form and select the Integrate tab. Find the Google Ads card in the list and click Configure.
3. Step 1: Connect your Google Ads account
The modal opens on step 1. Click Connect Google account…
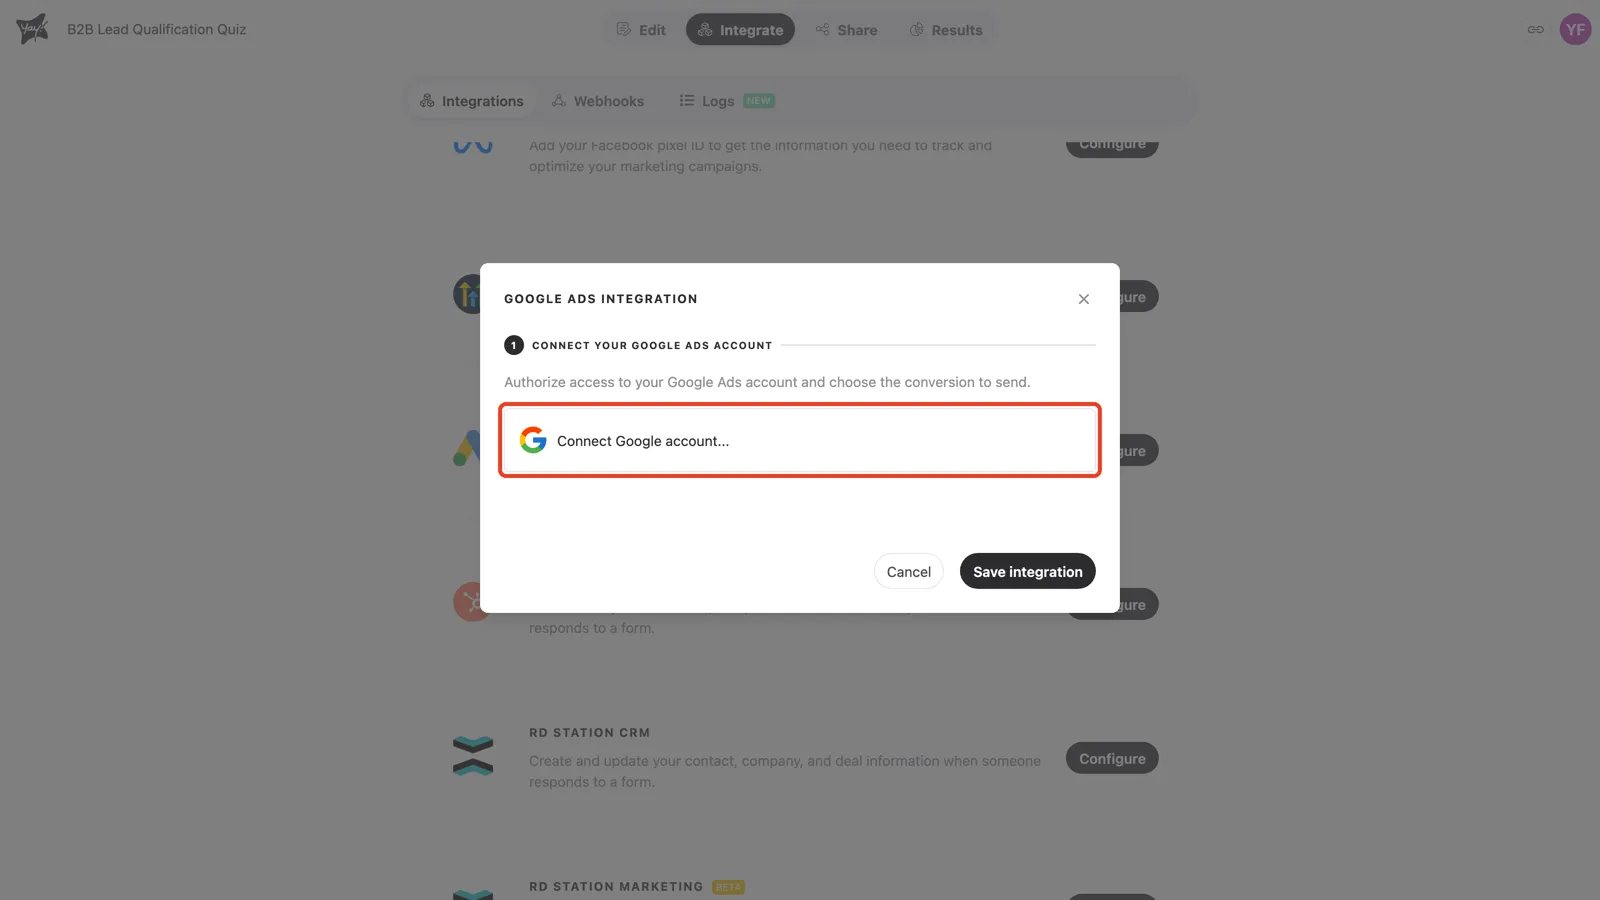
A Google window opens. Sign in with the Google account that has access to your Google Ads account and authorize Yay! Forms. The connection is saved to your workspace: the next time you (or a teammate) configure Google Ads on another form, the account appears in this dropdown, ready to select.
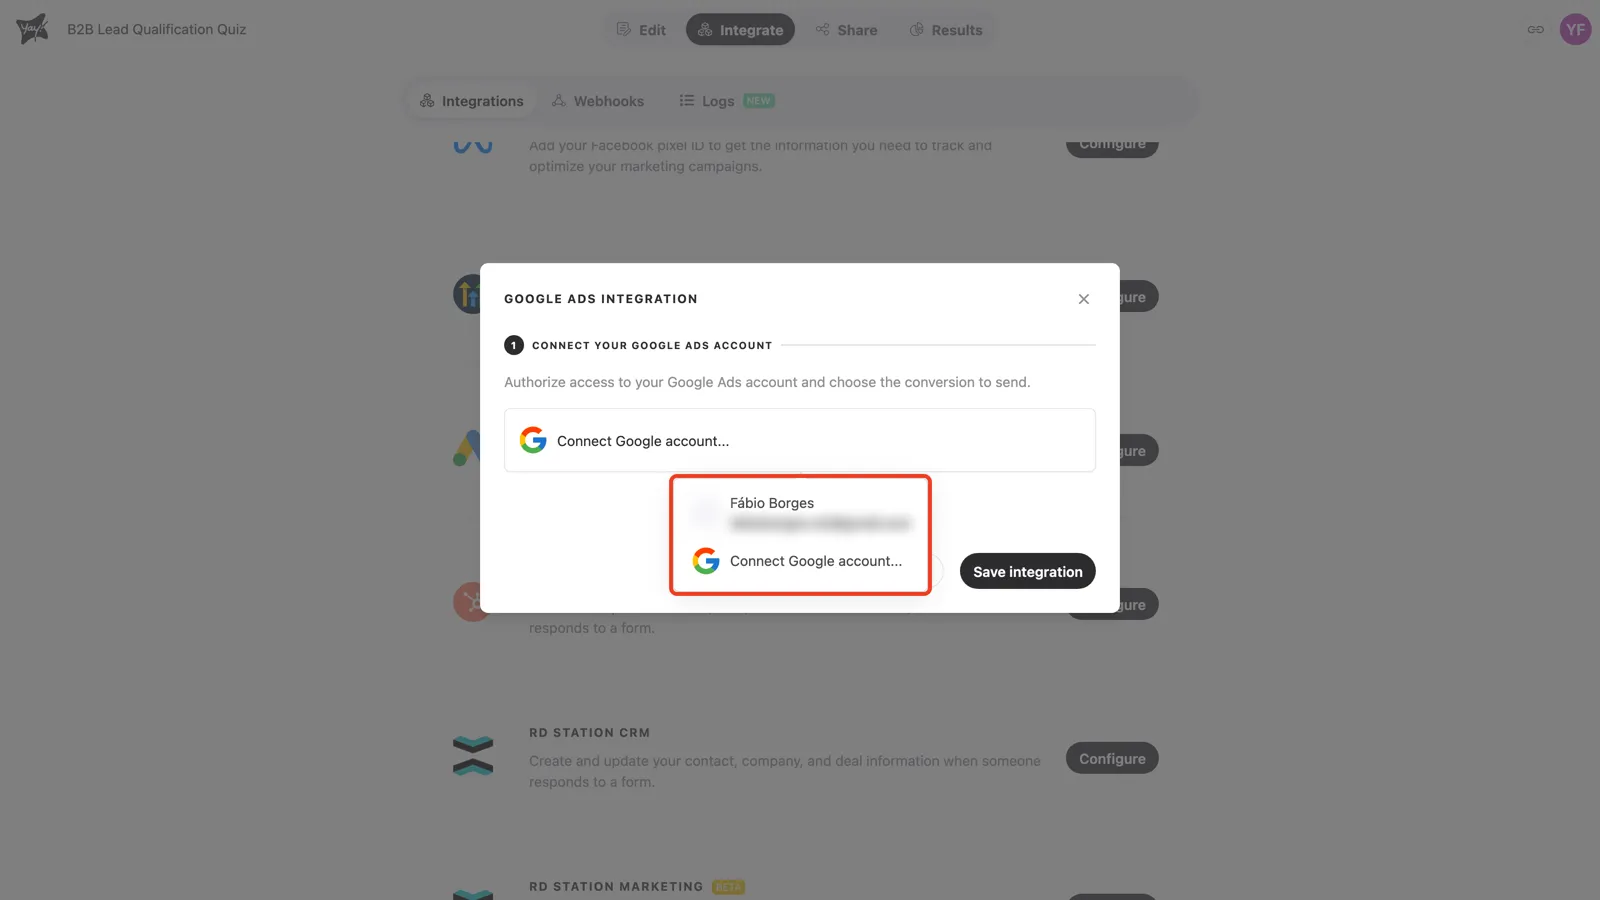
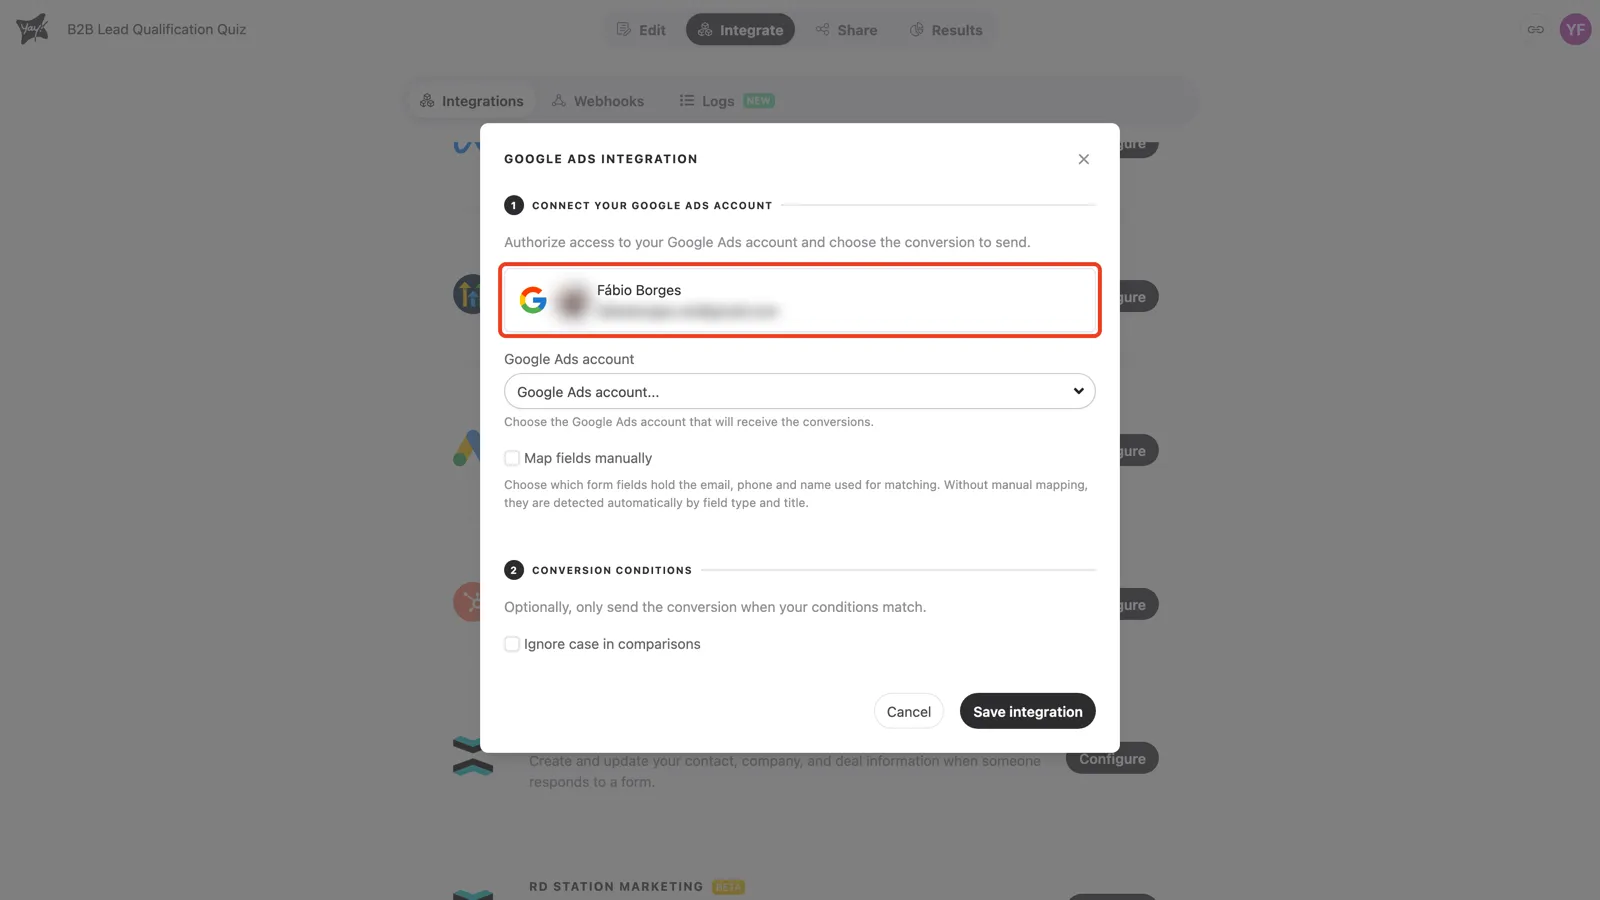
Once connected, the account appears as a card in step 1 and the remaining settings become visible.
Choose the Google Ads account
The Google Ads account dropdown lists every Google Ads account your Google login can access, including manager accounts. Choose the account that will receive the conversions.
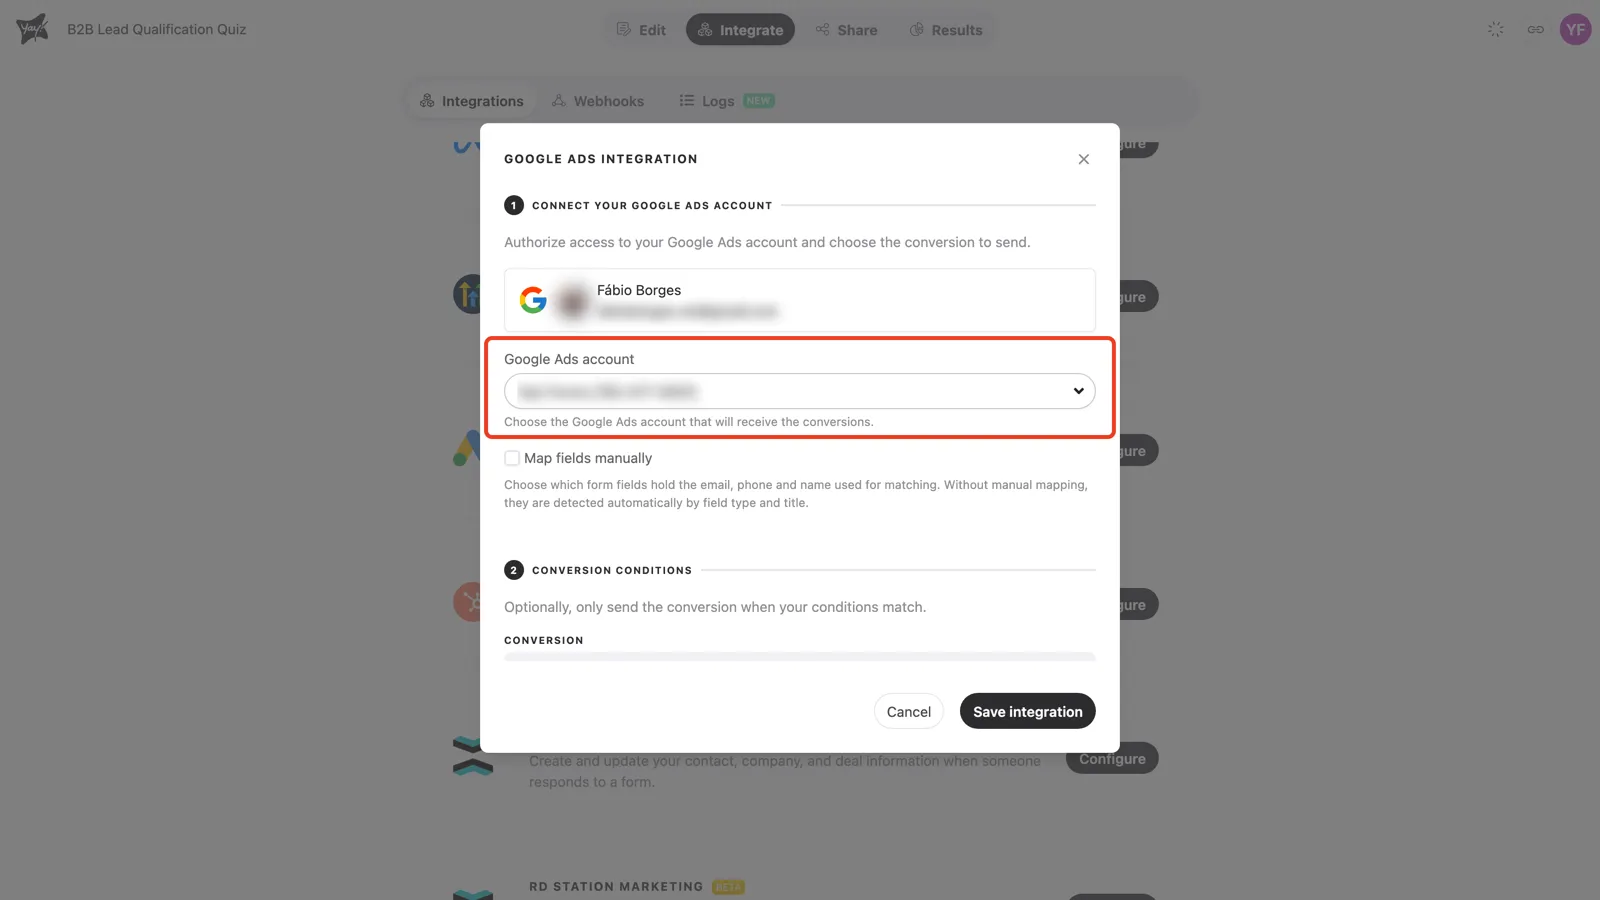
Map fields manually (optional)
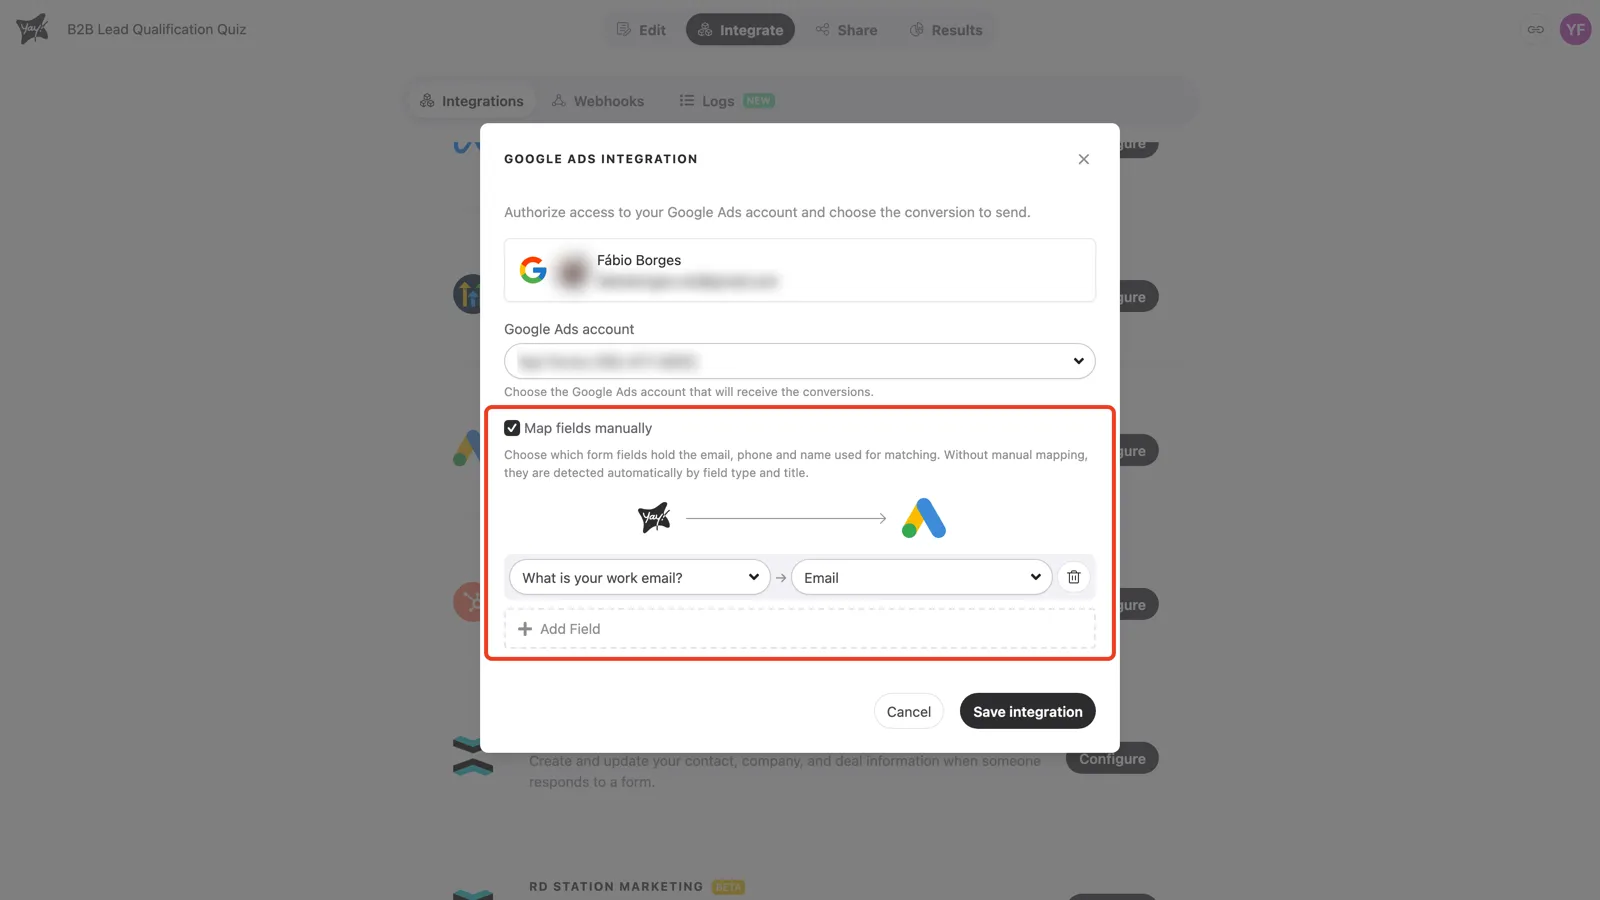
To match a conversion to a real click and person, Yay! Forms sends the respondent’s email, phone, and name along with the gclid. By default it finds these values on its own, detecting the right questions by field type and title. If your form captures them in fields Yay! Forms can’t detect (for example, the email lives in a plain text question), check Map fields manually.
A mapping row appears: pick a source on the Yay! Forms side and a destination on the Google Ads side (Email, Phone, First name, Last name). The source list covers your questions, hidden fields, tracking parameters, and variables. Click Add Field for more rows.
4. Step 2: Conversion conditions
The Conversion dropdown lists the eligible conversion actions of the account you chose in step 1. Select the one this form should report.
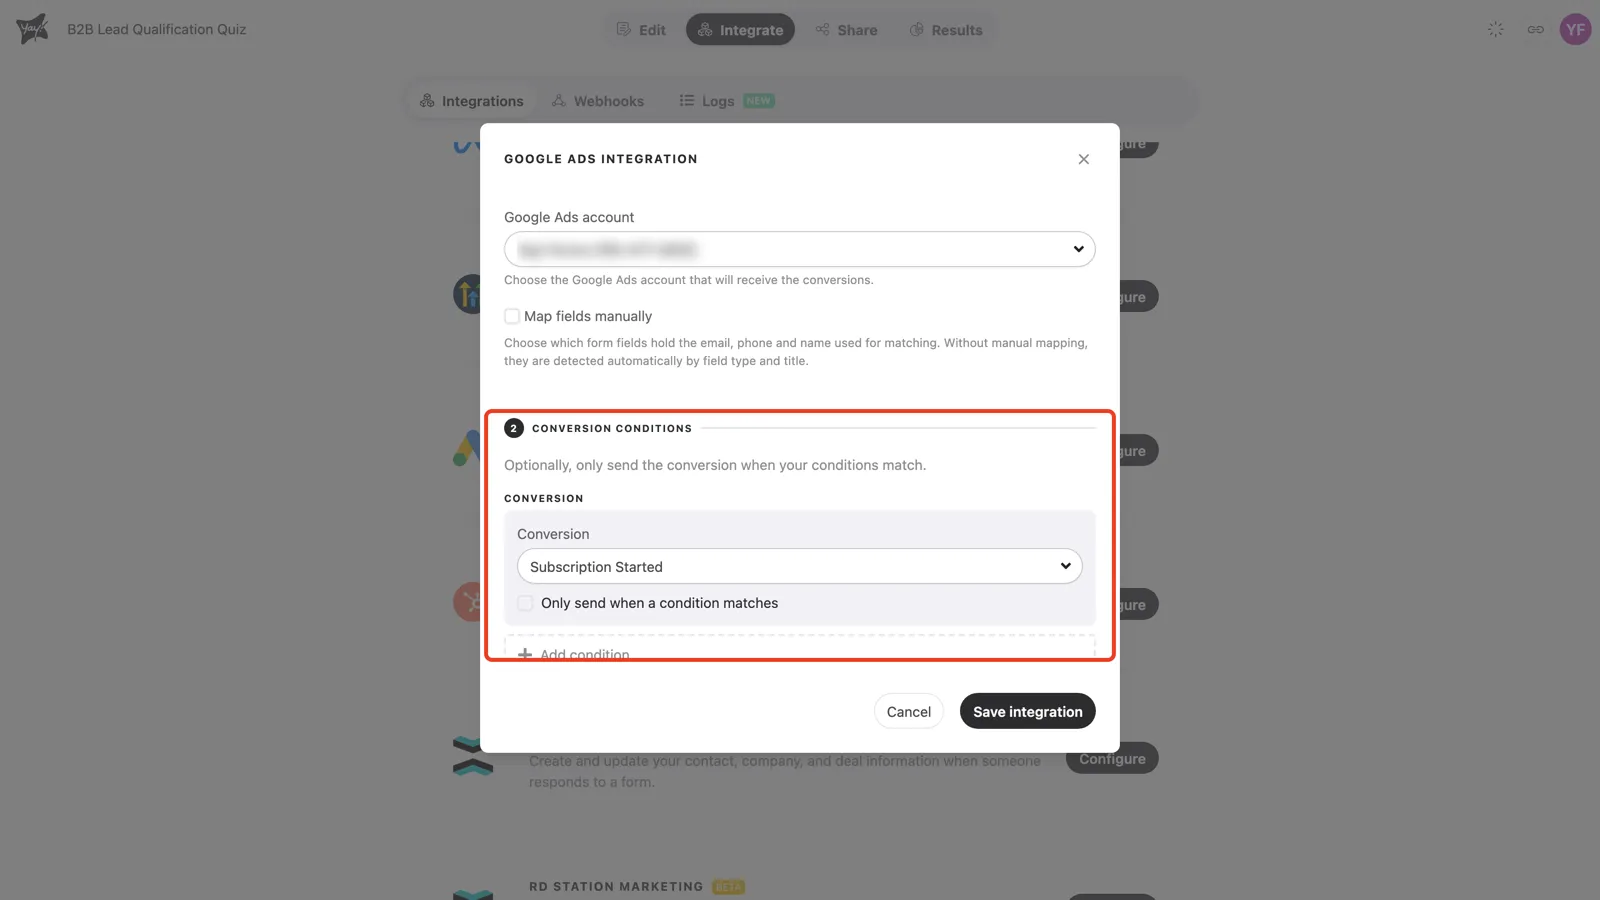
By default, the conversion is sent for every submitted response. That fits a form where every submission is the goal, like a demo request. For a quiz or qualification form, sending every submission would teach Google Ads to optimize for any respondent, including the ones you don’t want. Conditions fix that.
Check Only send when a condition matches to reveal the Trigger condition editor. Write an expression with the form’s fields and variables: type @ to insert a field, or click Write with AI to describe the rule in plain language and get the expression written for you. The example below only reports the conversion when the respondent’s score passed the qualification bar:
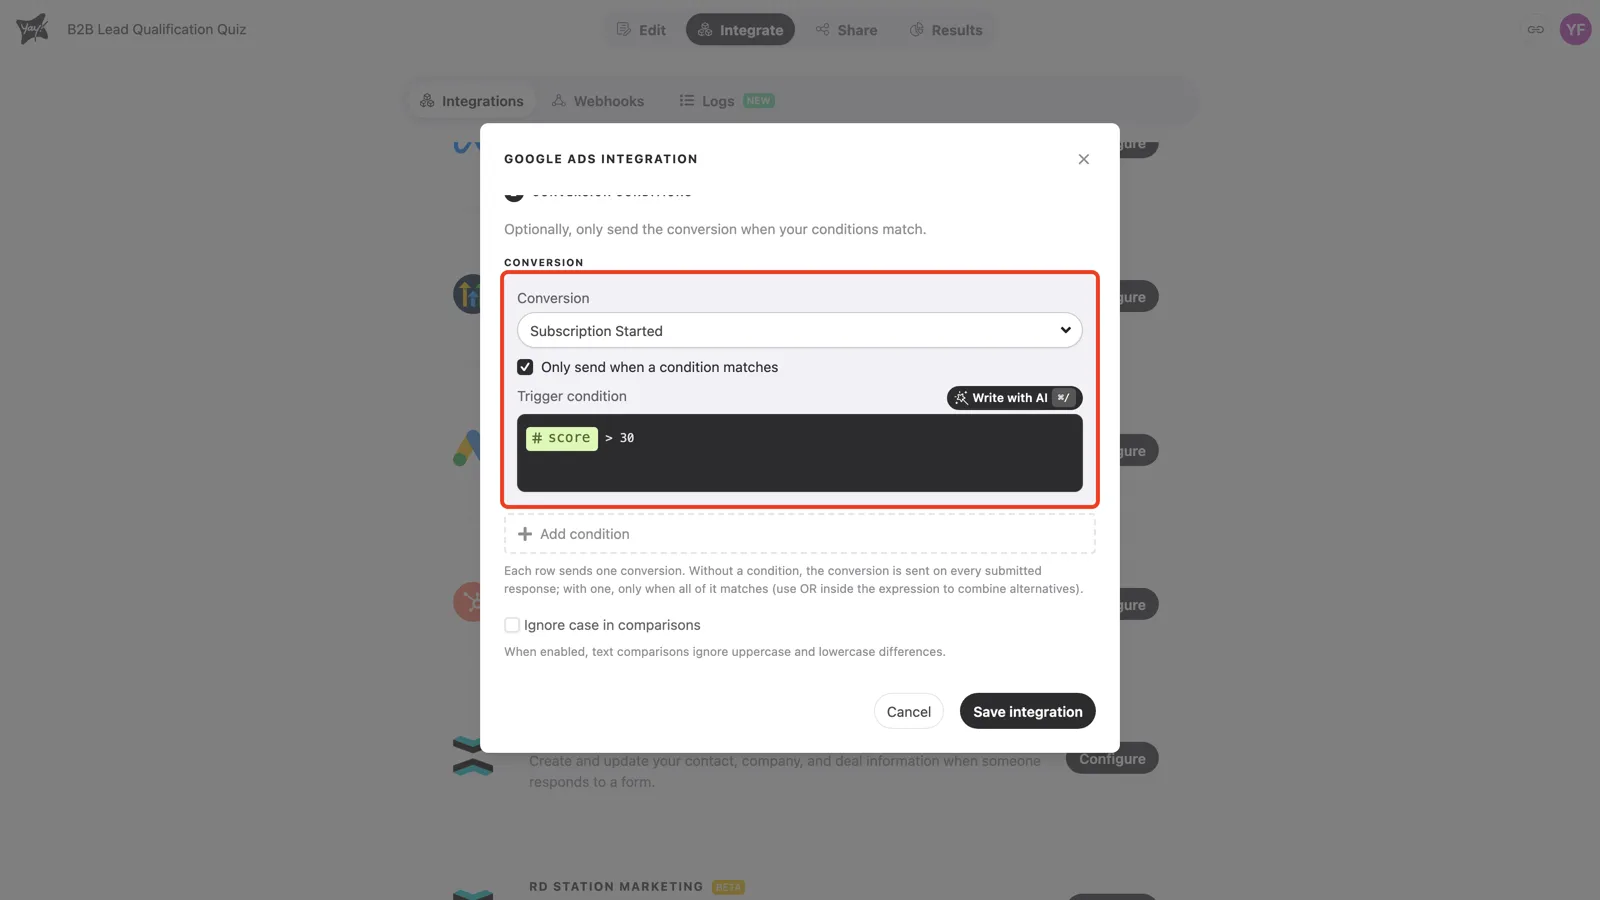
The full expression syntax, with all operators and ready-to-adapt examples, is in How to create expressions for conditional integration execution. Two more controls round out the step:
- Add condition: adds another conversion row. Each row sends one conversion, with its own conversion action and its own optional condition. Use it to report, say, “Lead” for every submission and “Qualified lead” only above a score threshold.
- Ignore case in comparisons: makes text comparisons ignore capitalization, so “Yes” and “yes” evaluate the same.
Click Save integration.
5. Confirm the delivery
Submit a test response through your published form link, then open the Logs tab on the Integrate screen. Each execution appears with its timestamp and status; Succeeded means Yay! Forms delivered the conversion to Google Ads. Details in How to view your integration logs.
How attribution works
When someone clicks your ad, Google appends a click id (the gclid) to the destination URL. Yay! Forms captures it from the form link automatically, with no hidden field setup, and sends it back with the conversion so Google Ads credits the exact campaign, ad group, and keyword. Alongside the click id, the respondent’s email, phone, and name are sent in the hashed format Google requires (this is what the enhanced conversions opt-in from the prerequisites enables), which lets Google match the conversion even when the click id is missing.
For the capture to work, the gclid has to reach the form’s address:
- Ad pointing straight to the form: nothing to do. The gclid arrives on the form link and is captured.
- Form embedded on your landing page: make the embed inherit the page’s URL parameters, as shown in How to inherit URL parameters in your embedded form.
Good to know
- One connection, many forms: the Google credential belongs to the workspace. Configure Google Ads on another form by picking the saved account in the dropdown, with no new authorization.
- Switching accounts: open the integration again to connect a different Google account, or disconnect the current one.
- Primary or secondary: when you create the action, Google may set it as primary on the account-default goal, which is usually tied to several campaigns. Primary actions feed automated bidding, and a new conversion starts with no history. To watch it before it steers your bids, set the action to secondary under Goals → Summary and promote it later, once it has volume.
- Scored quizzes pair well with conditions: if your form doesn’t have a score yet, How to score and qualify leads with logic walks through building one, and this integration turns that score into the conversion signal your campaigns optimize for.
Conclusion
You created an import-from-clicks conversion action, connected your Google account, chose the Google Ads account, picked the conversion to send, and gated it behind a condition so only the leads you want feed your bidding. From here, Google Ads optimizes on conversions reported by the form itself, delivered server to server.
Related articles: