Yay! Forms has an official WordPress plugin. You install it, point it at your form, and it gives you a shortcode you can drop on any page or post. This article walks through the three steps.
Install the Yay! Forms plugin
In your WordPress dashboard, go to Plugins, click Add New Plugin, and search for Yay! Forms. Install it.
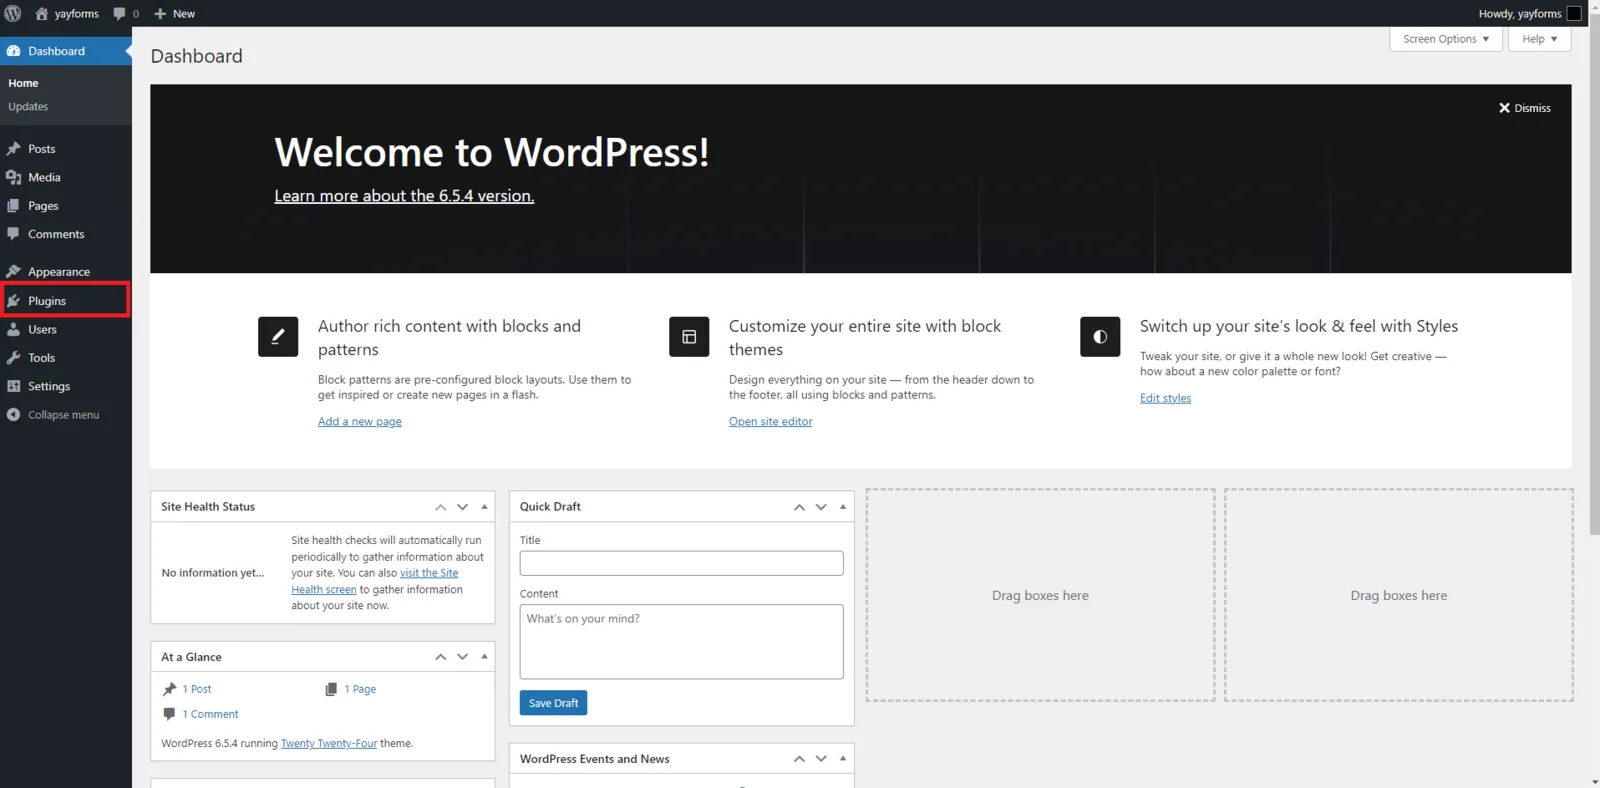
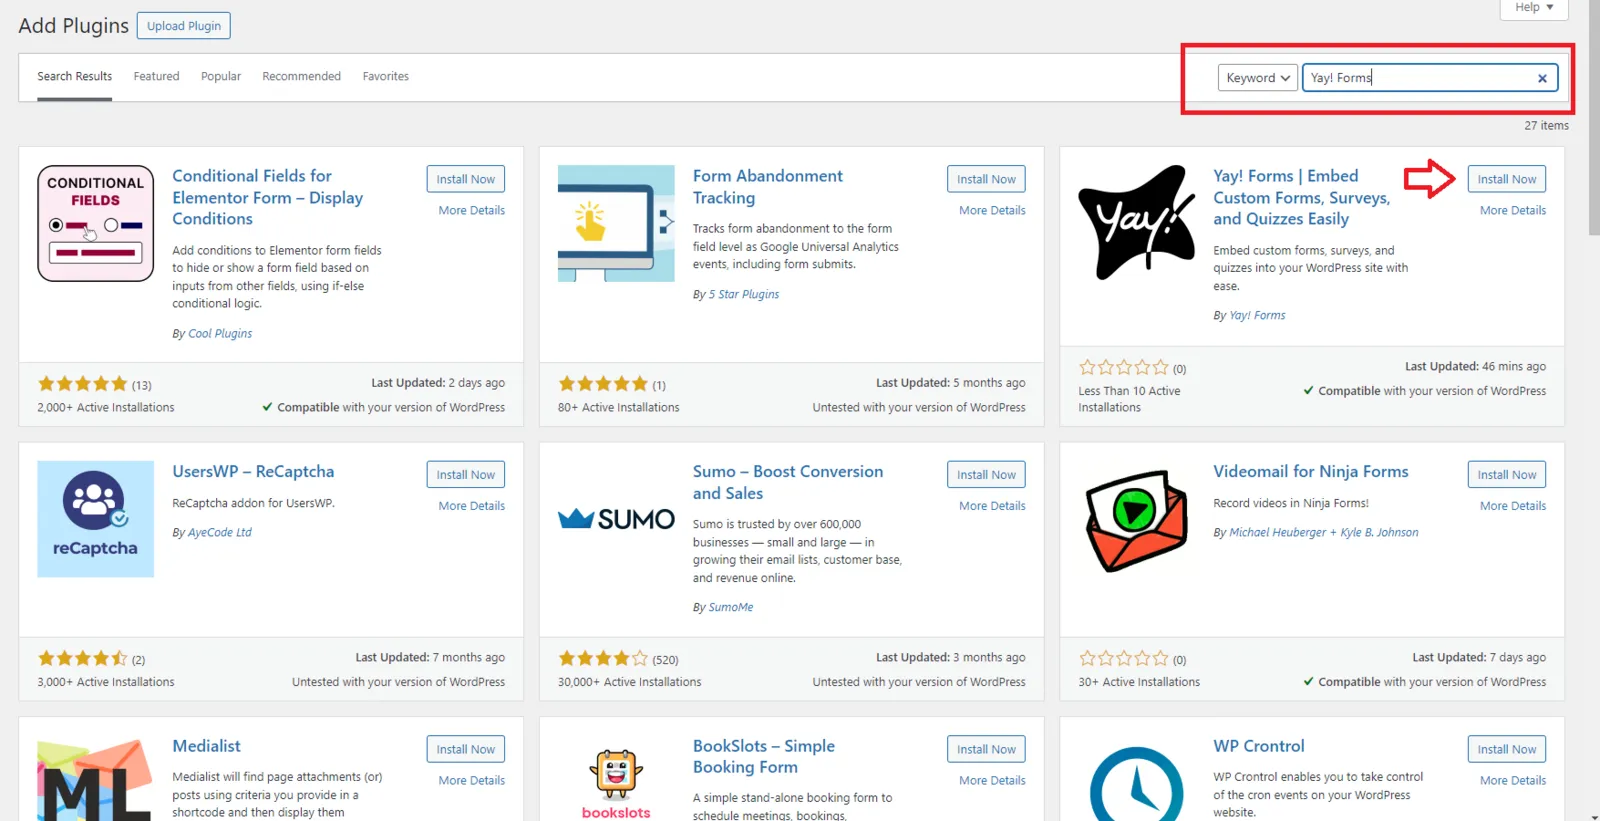
Once it’s installed, click Activate. A Yay! Forms menu item appears in your WordPress sidebar.
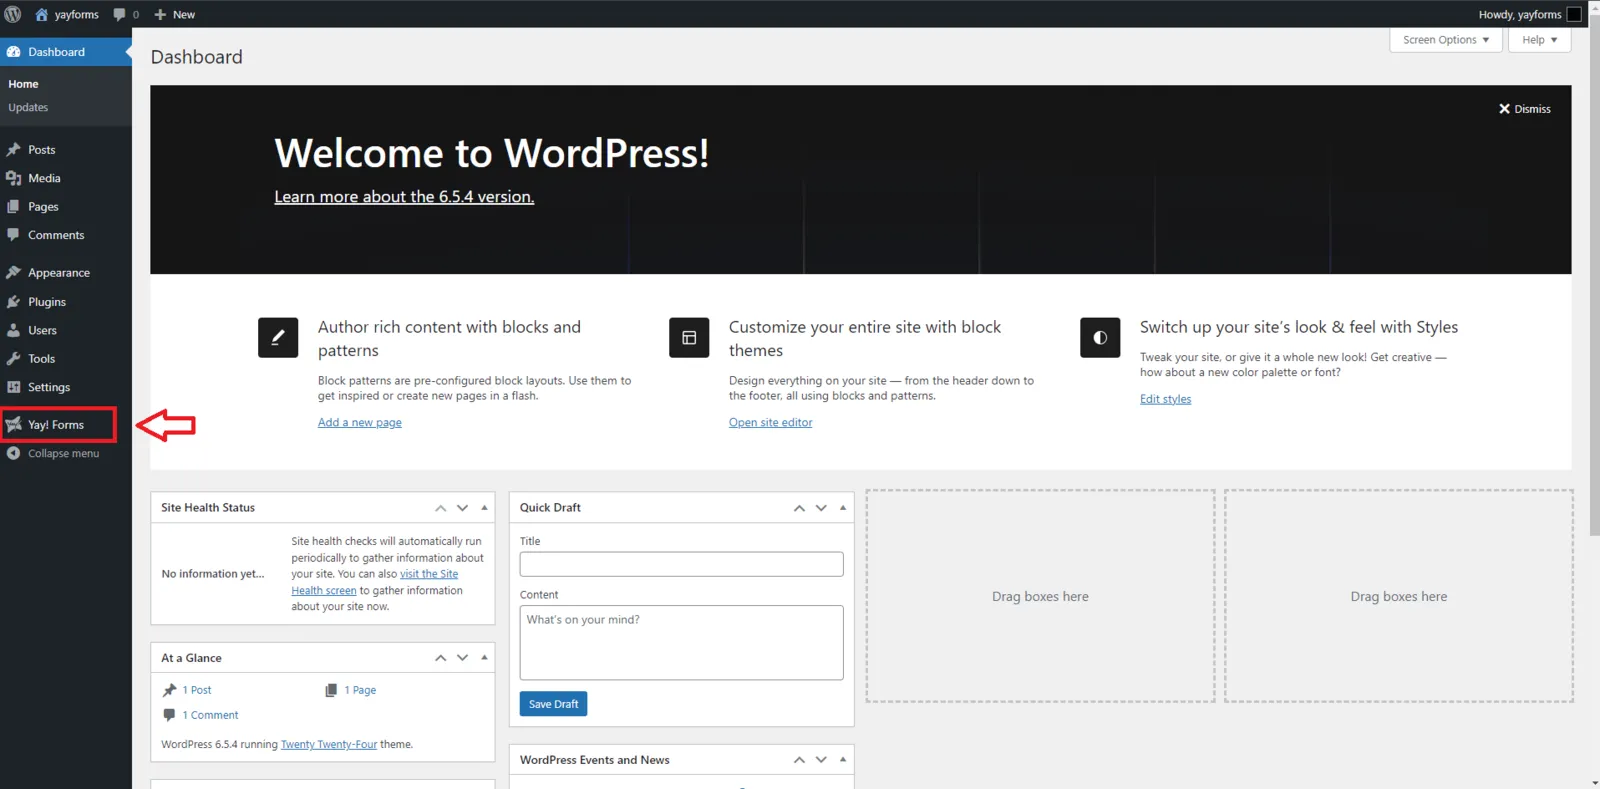
Configure your form and generate a shortcode
Open the Yay! Forms menu item to set up the embed. Enter your form ID, which you’ll find in the form’s Share tab in Yay! Forms.
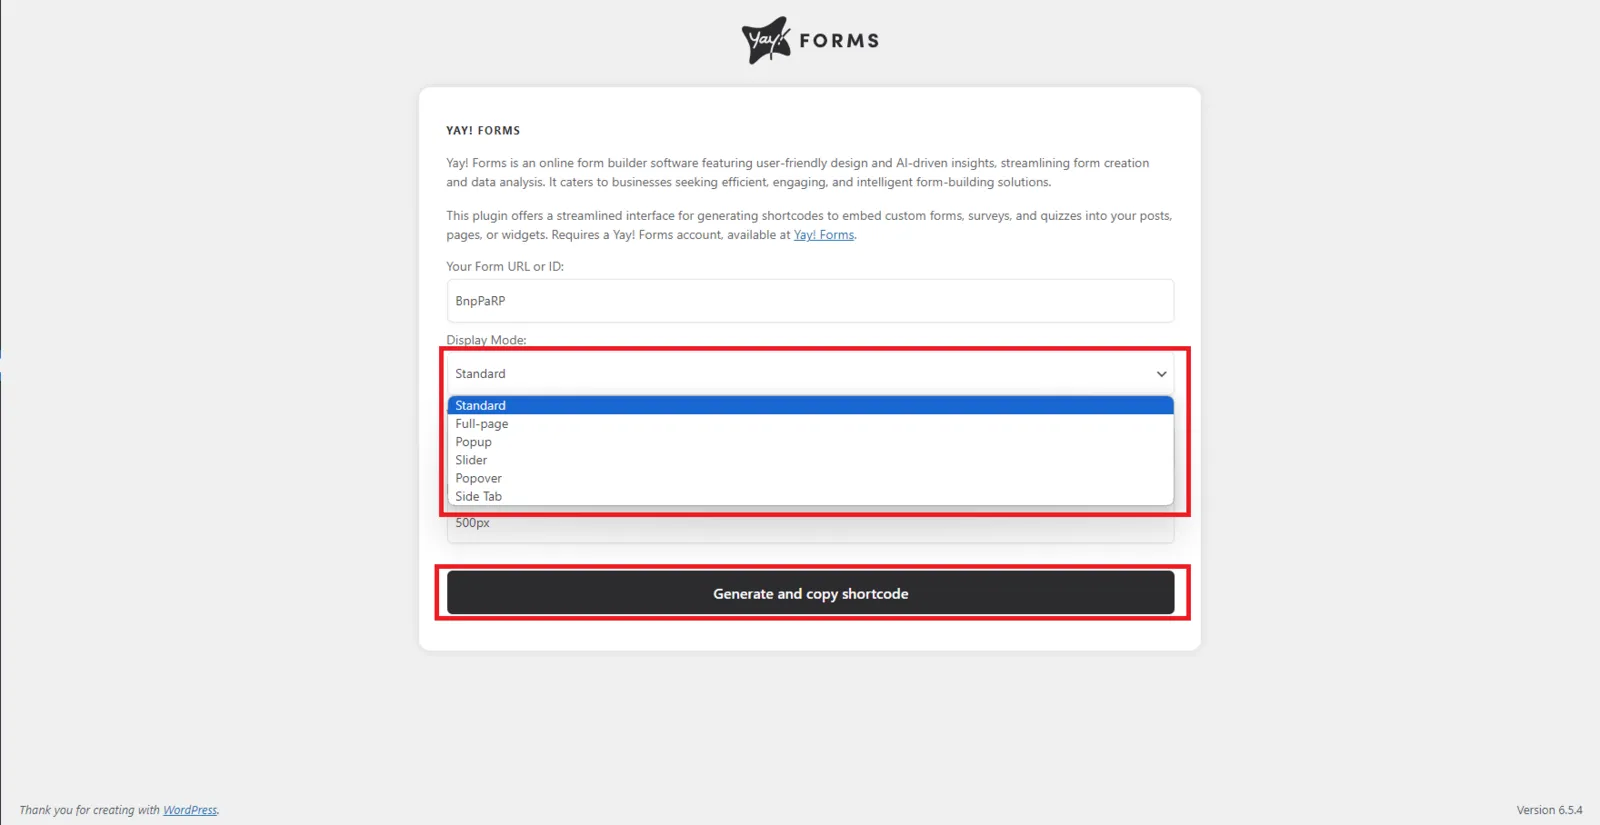
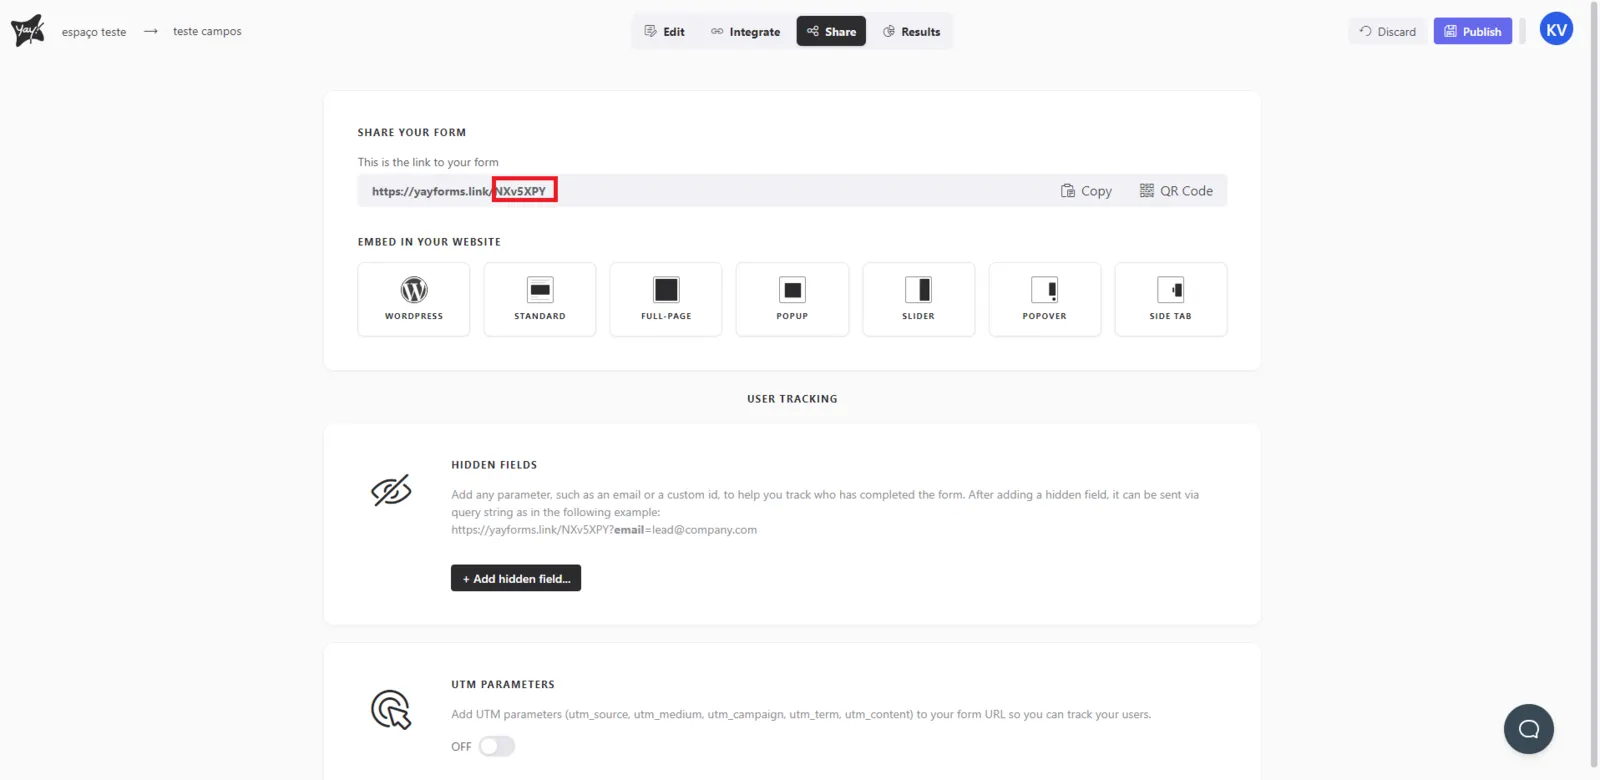
Set the embed options you want, then click Generate and copy shortcode.
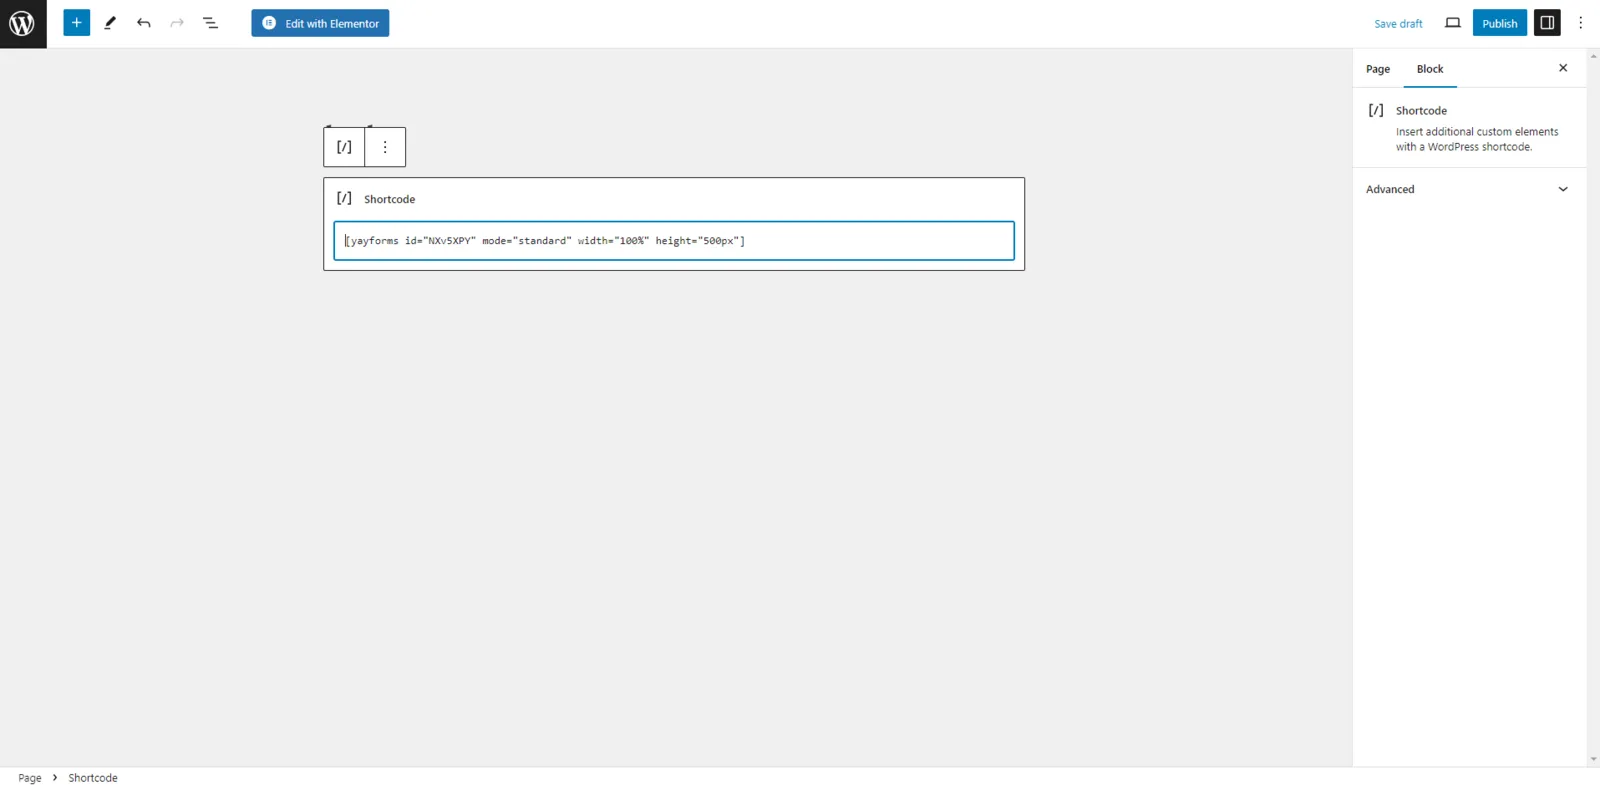
Add the shortcode to a page
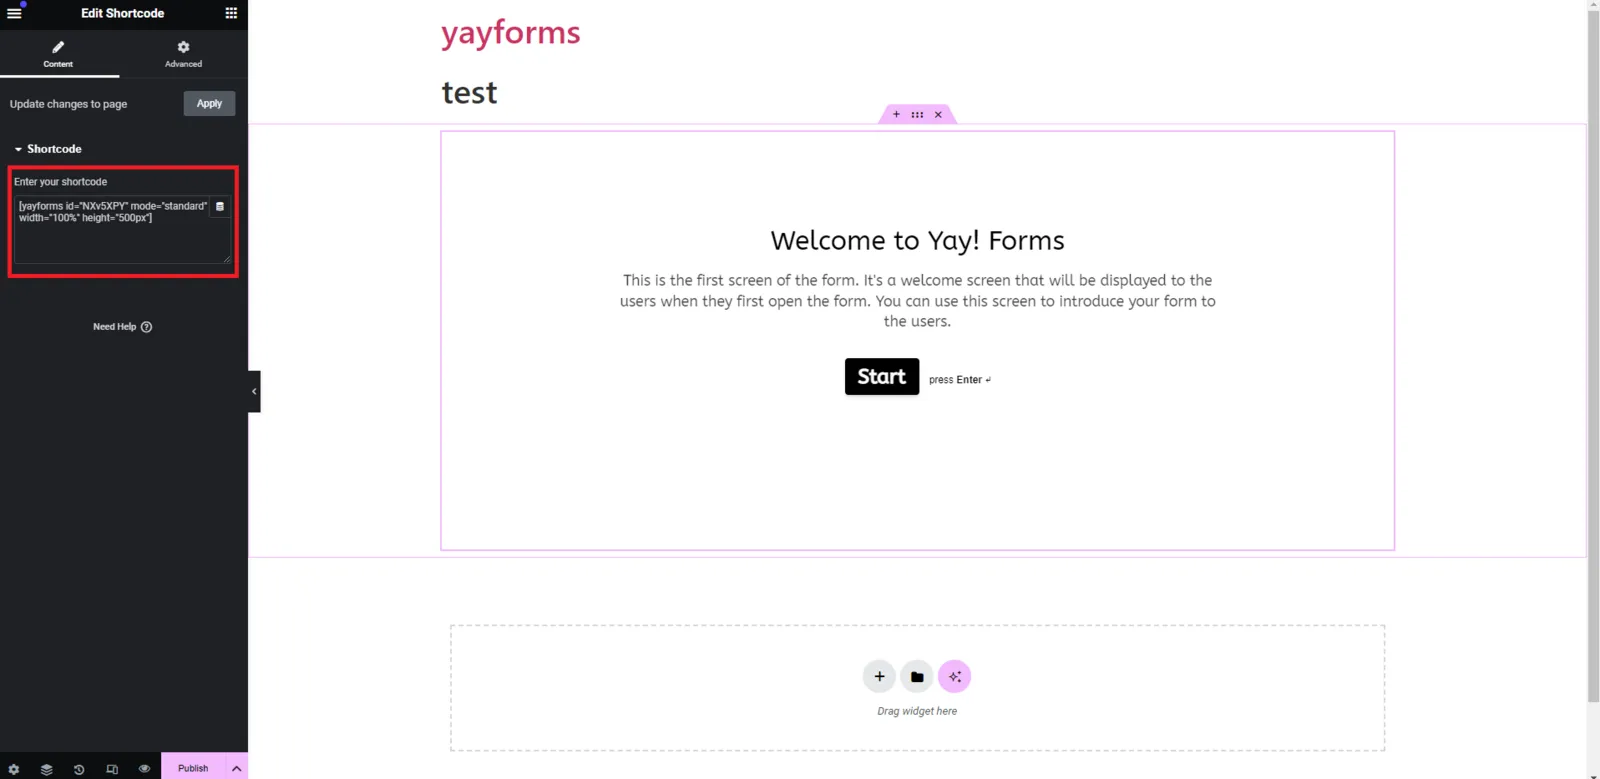
Paste the shortcode into any page or post. It also works inside Elementor: drop it into a Shortcode widget.
Conclusion
You learned how to install the Yay! Forms WordPress plugin, find your form ID in the Share tab, generate a shortcode, and add it to a page or an Elementor layout.
Related articles: